Arroz con Pollo (Spanish for chicken and rice) is a mouth-watering, budget-friendly, one-pot dish that only has about ten minutes of hands-on cooking time and is ready to go in a little over a half hour. Win, win, win, win, win!! It’s a staple on many Latin American tables, though the ingredients and techniques used to make the dish vary depending on the country. This arroz con pollo recipe is the Puerto Rican version and the one I grew up eating at my Abuela’s (grandmother’s) table.
What is arroz con pollo?
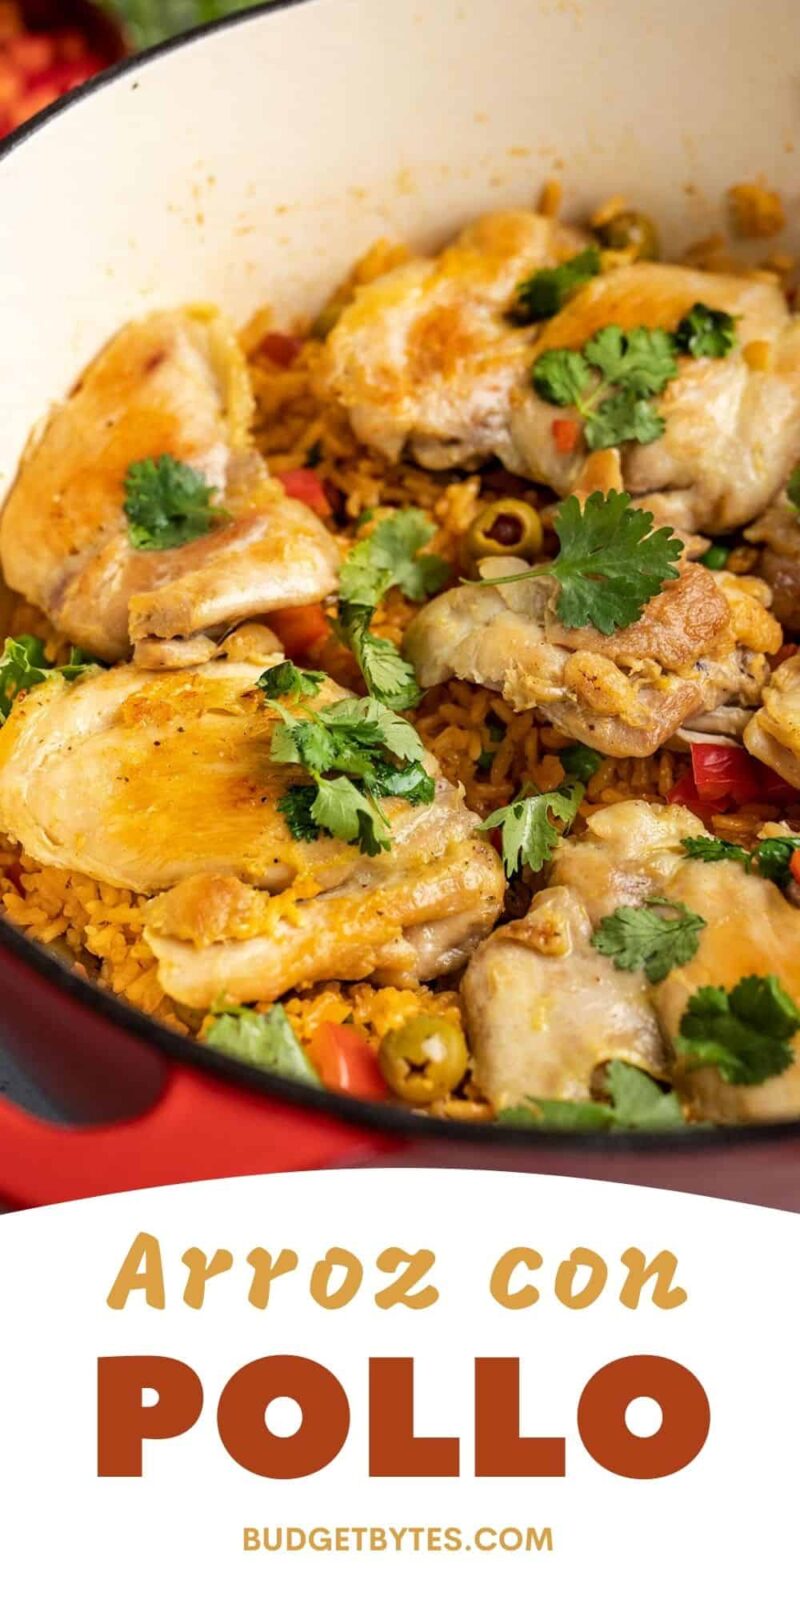
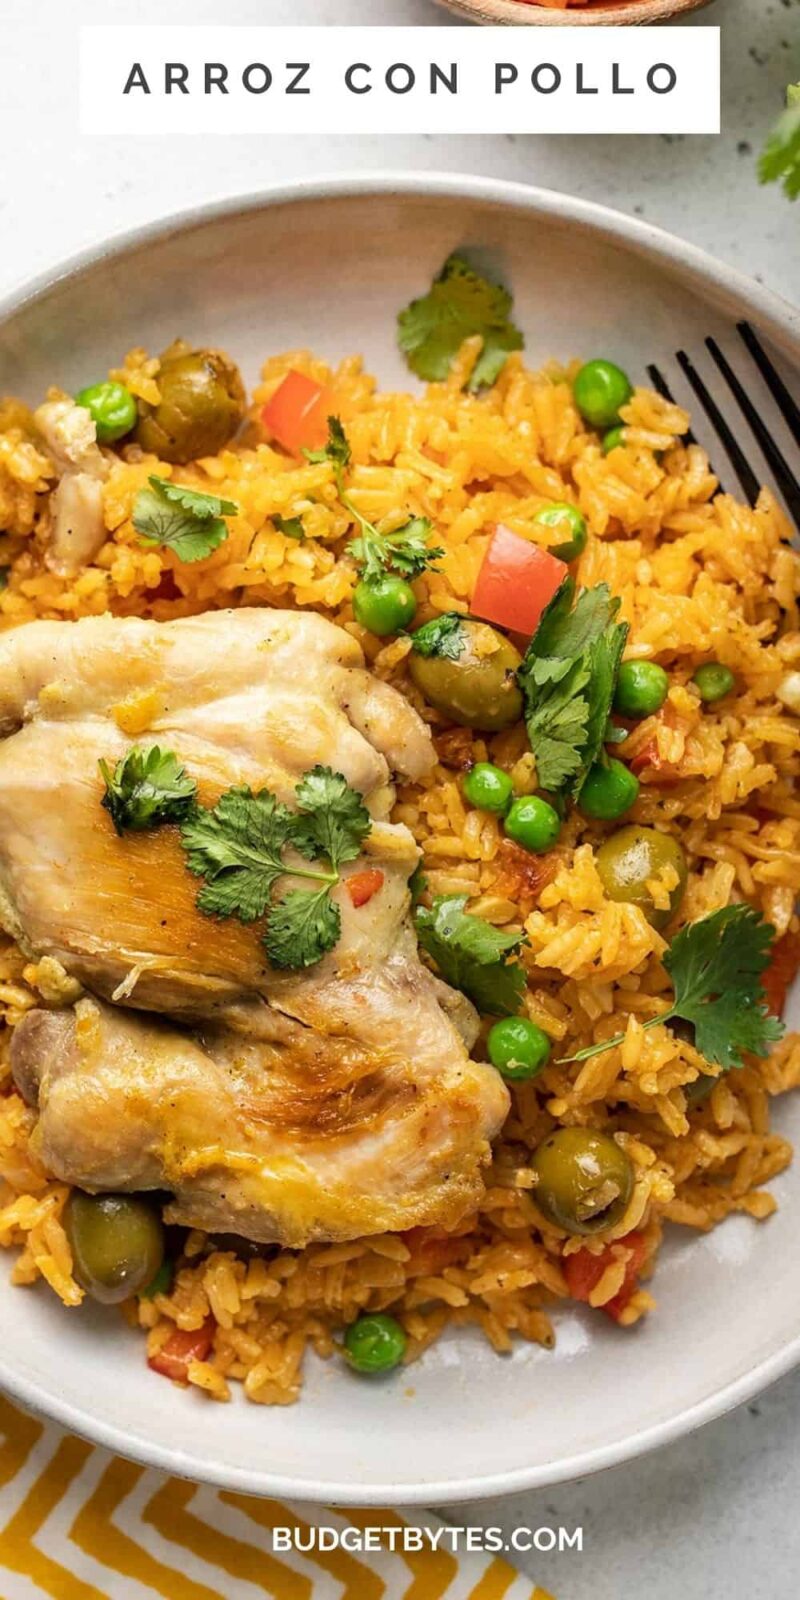
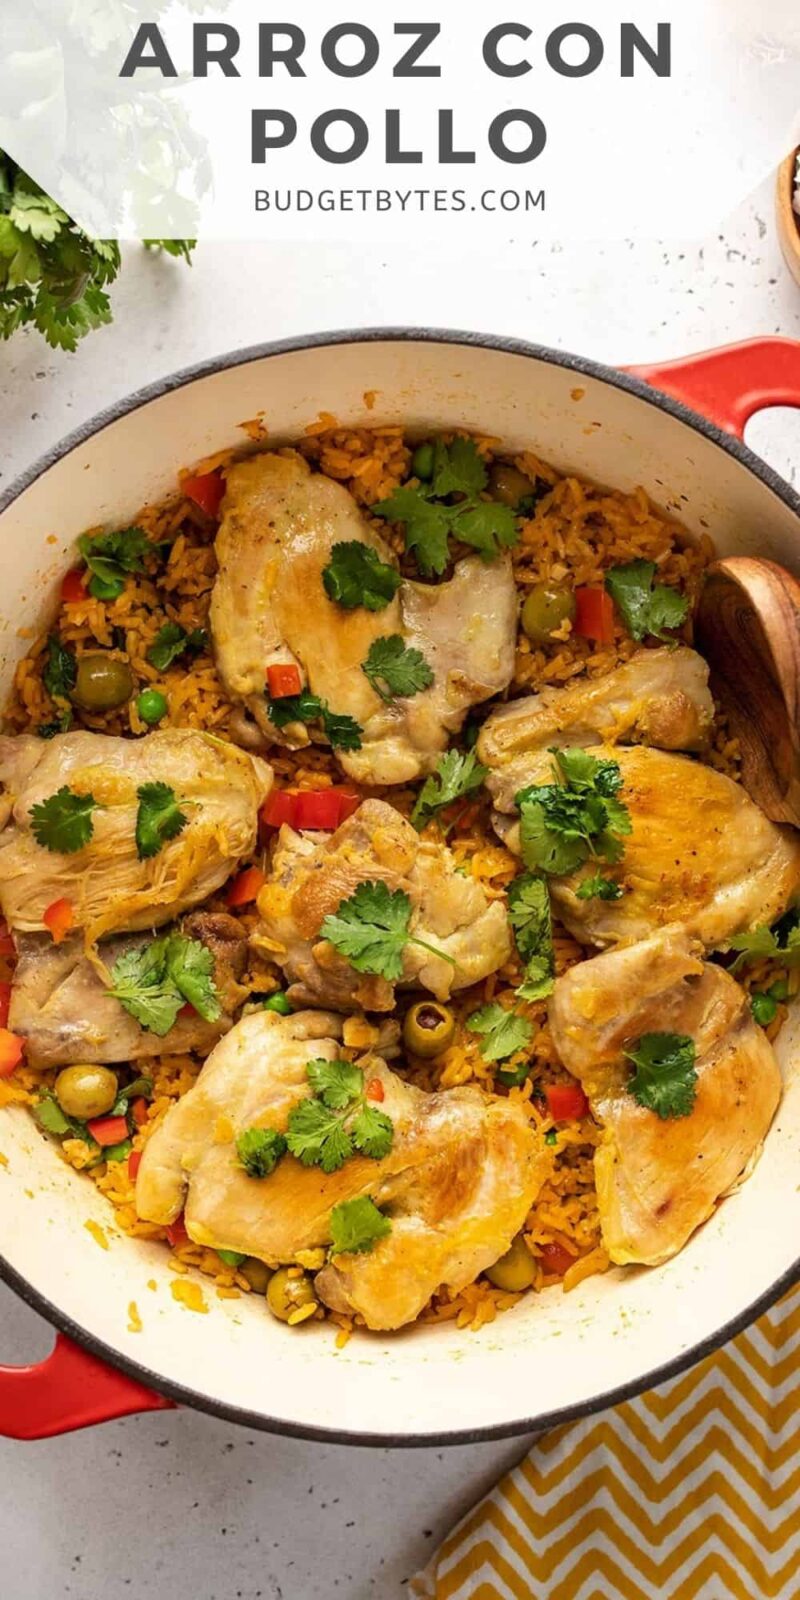
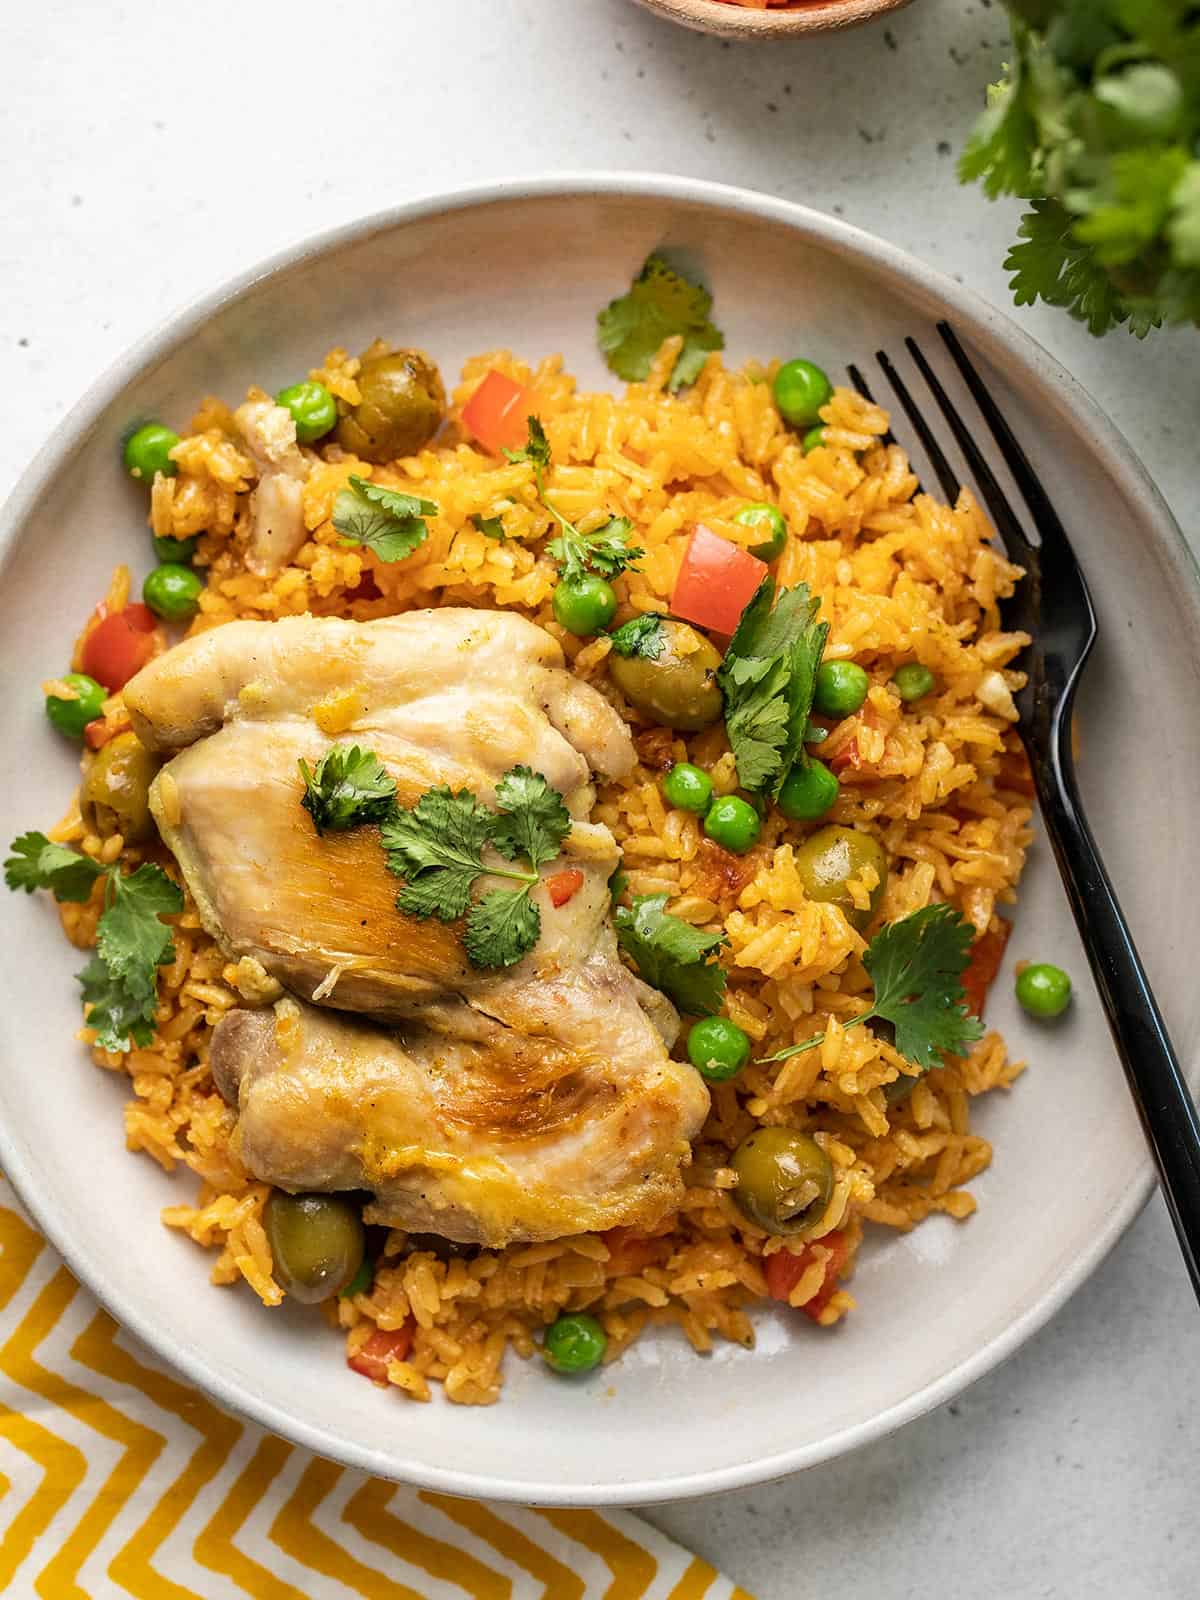
At its most basic, arroz con pollo is a one-pot chicken and rice dish. In the Puerto Rican version, the rice is rendered a bright yellow by annatto, the same spice that gives cheddar cheese its signature golden hue. It gets earthy herbal notes from the recaito (aka sofrito), a fragrant puree of cilantro, yellow onions, green bell peppers, and garlic. And there are delightful pops of acidity from the Spanish olives. Traditionally, pigeon peas are used, but they can be hard to find on the mainland, so frozen peas make for an easy substitute. As with all Puerto Rican rice dishes, the bottom of the pot will develop crispy, golden brown bits of rice known as “pegao.”
What cuts of chicken should I use?
You can use any cut of chicken, though you should be mindful that darker meat, like thighs and drumsticks, is more forgiving of a longer cooking time because of their higher fat content. Chicken breasts can dry out fairly quickly, so keep an eye on them. You can also keep the chicken pieces whole or on the bone. For pickier eaters, feel free to slice the chicken into bite-size pieces before cooking. If you use cuts with skin on, try removing the skin after cooking and placing it on a cookie sheet or sheet pan. Bake the skin in a 350ºF oven until crispy, and then use it as a garnish.
Can I substitute the rice?
If you want to substitute the white rice for brown, you’ll need to add more chicken stock. For 2 cups of brown rice, use 4 cups of chicken stock. You will also need to increase the cooking time by ten to fifteen minutes. You can also use cauliflower rice, but you won’t need to cook it as long, as it will turn to mush. Decrease the amount of chicken stock to 1 cup and cook the chicken in the liquid until it has reached 160 to 165ºFs. Remove the chicken from the pan and then stir in the cauliflower rice and the peas. Cook for just a few minutes until tender; add the chicken back to the pot and garnish.

Do I have to use chicken stock?
While chicken stock is traditional, you can substitute it with veggie stock or even salted water if you prefer. If you’re trying to waste less food, you can also use bean water. For creamier results with heavy tropical vibes, use a mixture of half chicken stock and half coconut milk.
What can I serve it with?
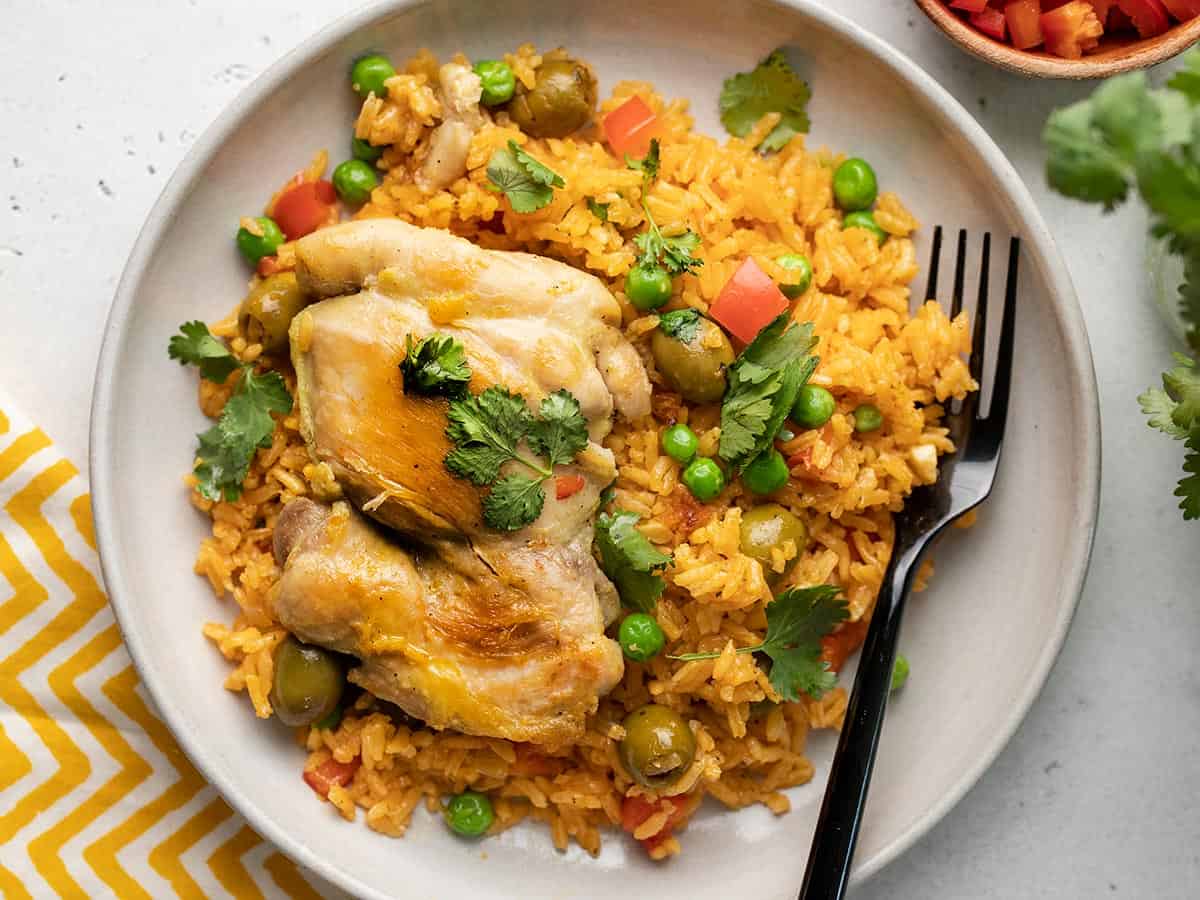
Arroz con Pollo is a full meal, but it is traditionally served with a few slices of ripe avocado. You can make a vibrant and simple side salad as well. I also love it with a few hearty slices of garlic bread.
Does arroz con pollo freeze well??
Arroz con Pollo is perfect for meal prep and freezer meals. It will last up to three days in your refrigerator. Sprinkle it with a little water before reheating to loosen it up. If freezing, make sure that everything has cooled before portioning it into a freezer-safe container. You can prevent frost from forming on your rice by filling the container to the tippy top or by placing a piece of wax paper on top of the rice so it isn’t exposed to air.

Arroz Con Pollo (Puerto Rican Chicken and Rice)

Ingredients
- 2 tsp adobo seasoning ($0.20)
- 1.5 lbs boneless chicken thighs ($6.49)
- 2 2/3 Tbsp cooking oil, divided ($0.11)
- 1/4 cup sofrito ($0.36)
- 1 red bell pepper, small dice, divided ($0.98)
- 1/2 yellow onion, small dice ($0.19)
- 3 cloves garlic, minced ($0.24)
- 2 Tbsp tomato sauce ($0.06)
- 1/2 cup pimiento stuffed Spanish olives ($1.16)
- 2 cups rice ($0.74)
- 2 1/2 cups chicken stock ($1.12)
- 1/4 tsp salt ($0.02)
- 1 1/2 tsp sazón seasoning ($0.19)
- 1/2 cup frozen green peas ($0.33)
- 1/4 cup cilantro (optional garnish) ($0.11)
Instructions
- Place chicken thighs in a shallow bowl and rub down with 2 teaspoons of cooking oil and adobo seasoning. Place uncovered in your refrigerator and allow to marinate for thirty minutes.
- Set a Dutch oven or other heavy-bottomed large pot over medium-high heat. Add the remaining 2 tablespoons of cooking oil to the pot. Once the oil is shimmering, add the chicken thighs to the pot, arranged in an even layer. Sear each side of the thighs until golden brown, about 3 minutes per side. Remove the thighs from the pot and set them aside.
- Add the sofrito, diced onion, and half of the diced red pepper to the chicken fat in the pot. Sauté until the onion is translucent, about 3 minutes. Add the garlic, tomato sauce, and olives. Sauté the mixture until it's fragrant and most of the liquid has cooked out. A spoon run down the middle of the pan should leave a dry trail.
- Add the rice, sazón, and salt and gently mix them into all of the ingredients, so that every grain is covered in the sauce. Add chicken stock and bring to a boil. Allow mixture to boil undisturbed until some of the stock has evaporated and the rice is visible on the surface of the pot, about 5 to 8 minutes. There should be multiple round steam vents on the surface of the rice.
- Place the reserved chicken thighs on top of the rice. Lower the heat to low and cover the pot with a tight-fitting heavy lid. Cook for 20 minutes, until all of the stock has evaporated and rice has cooked through.
- Remove the chicken from the pot and set it aside. Stir in frozen peas and fluff the rice. Add the chicken thighs back to the pot. Garnish with the remainder of the diced red pepper and cilantro leaves.
See how we calculate recipe costs here.
Equipment

Nutrition
How to Make Arroz con Pollo – Step by Step Photos
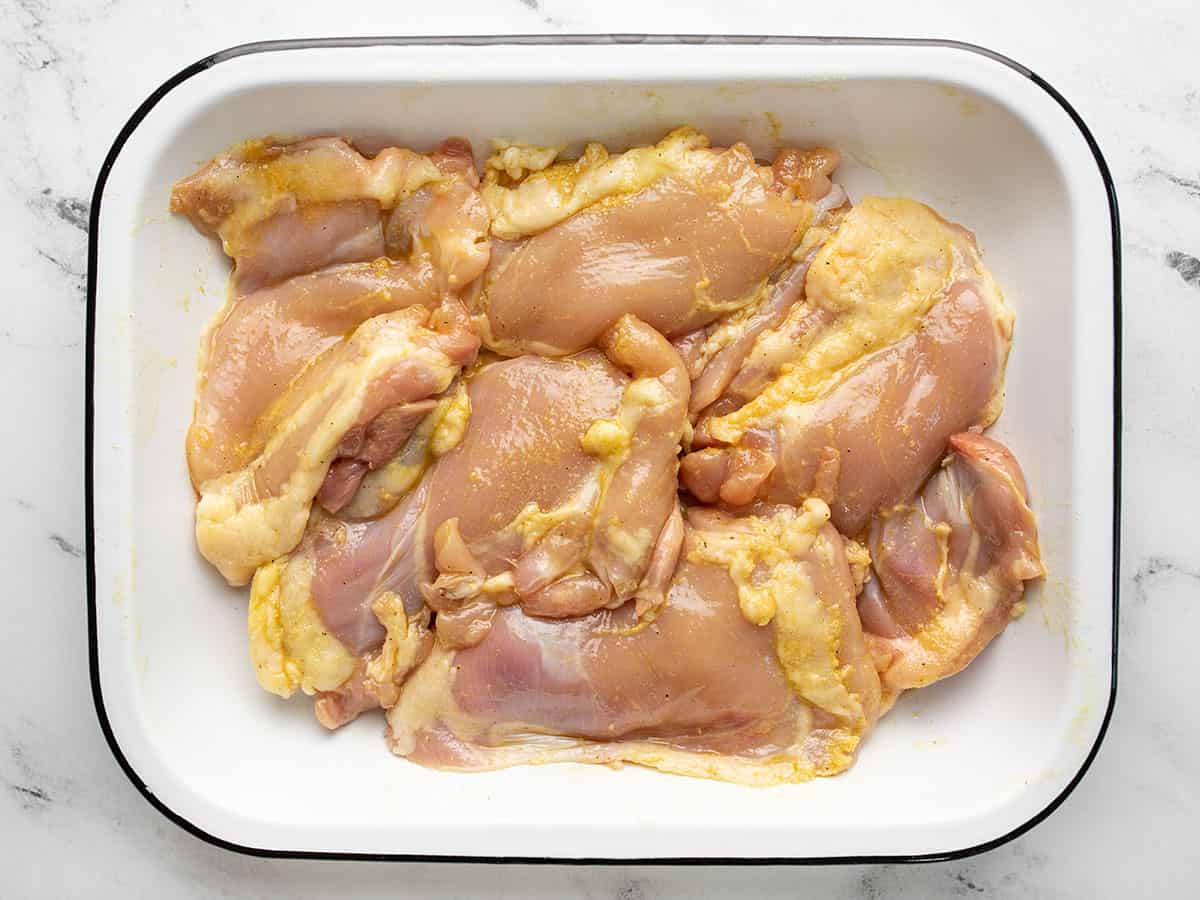
Place chicken thighs in a shallow bowl and rub down with 2 teaspoons of cooking oil and 2 teaspoons of adobo seasoning. Place uncovered in your refrigerator and allow to marinate for thirty minutes.
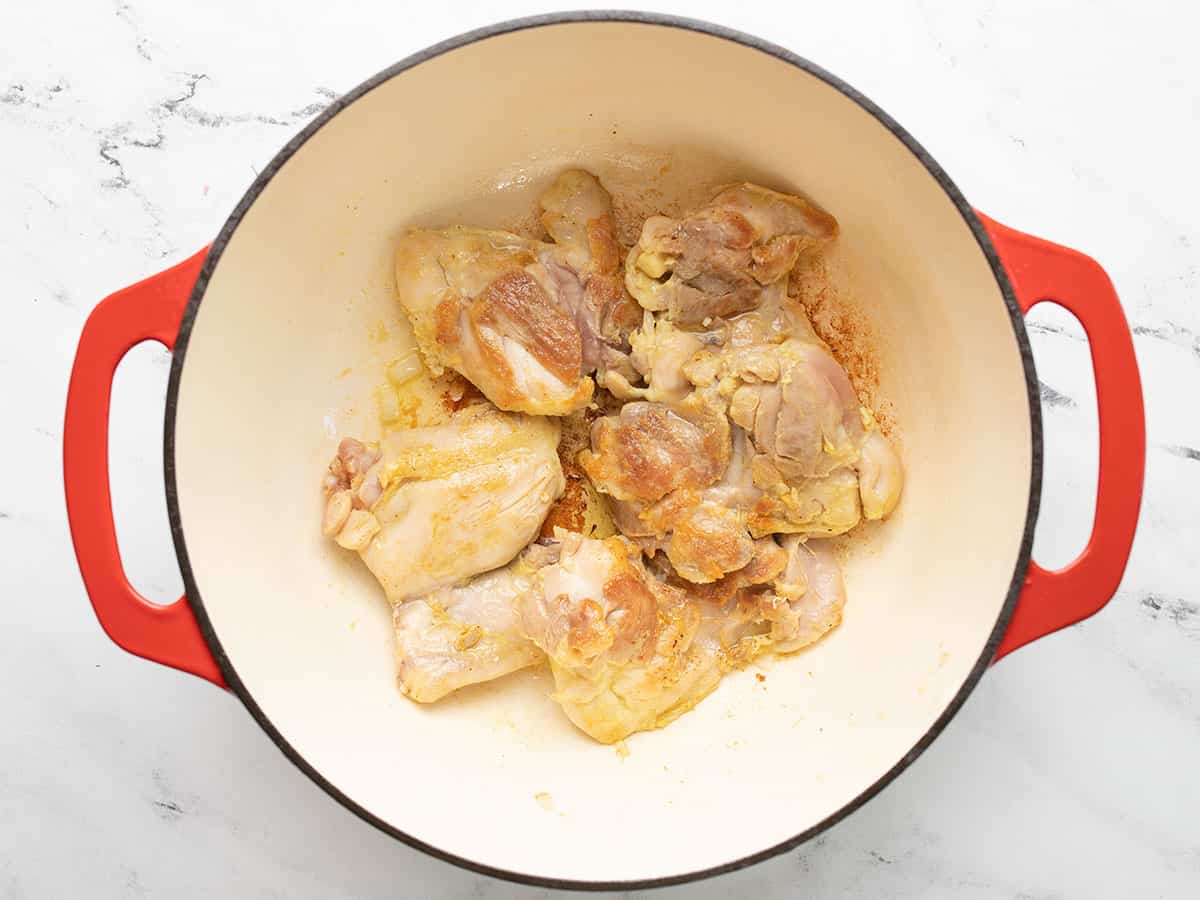
Set a Dutch oven or other heavy-bottomed large pot over medium-high heat. Add the remaining 2 tablespoons of cooking oil to the pot. Once the oil is shimmering, add the chicken thighs to the pot, arranged in an even layer. Sear each side of the thighs until golden brown, about 3 minutes per side. Remove the thighs from the pot and set them aside.
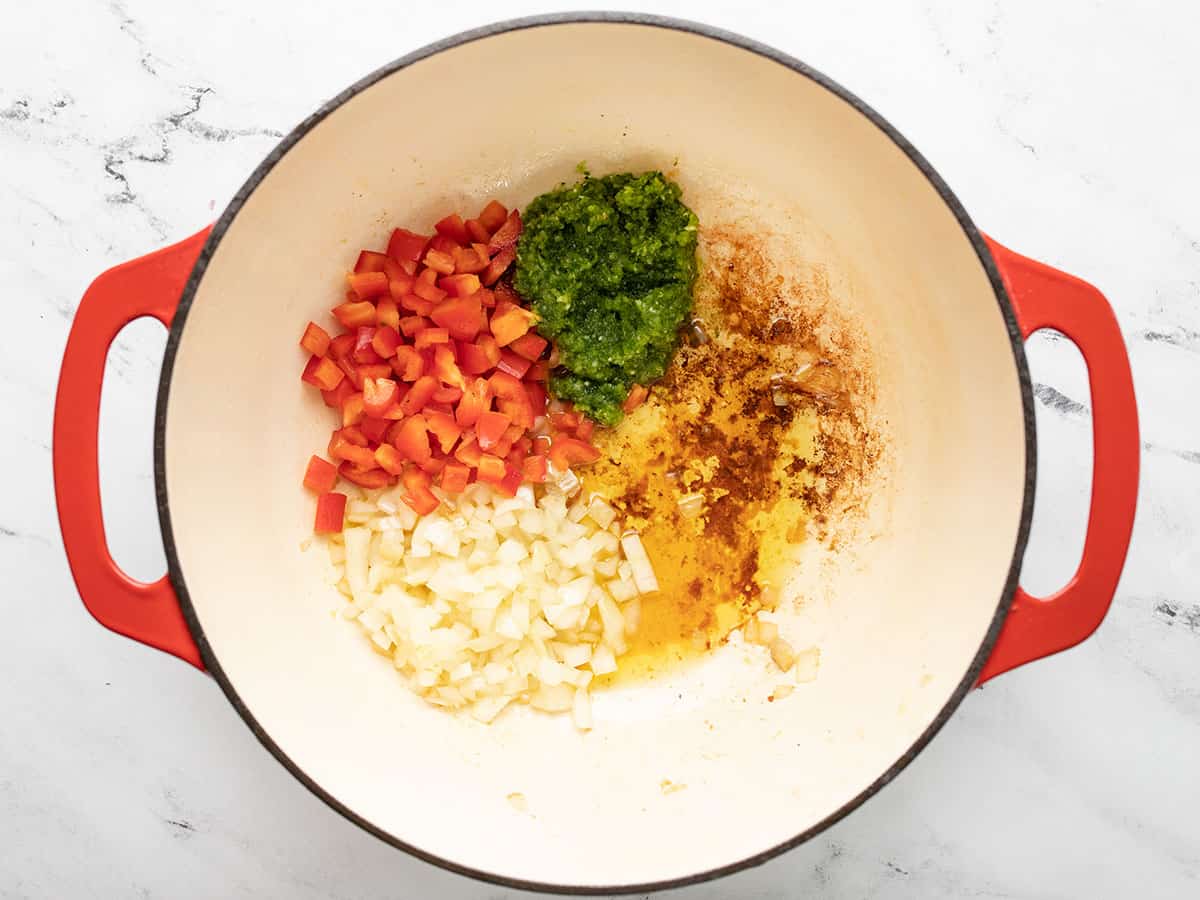
Add the sofrito, diced onion, and half of the diced red pepper to the chicken fat in the pot. Sauté until the onion is translucent, about 3 minutes.
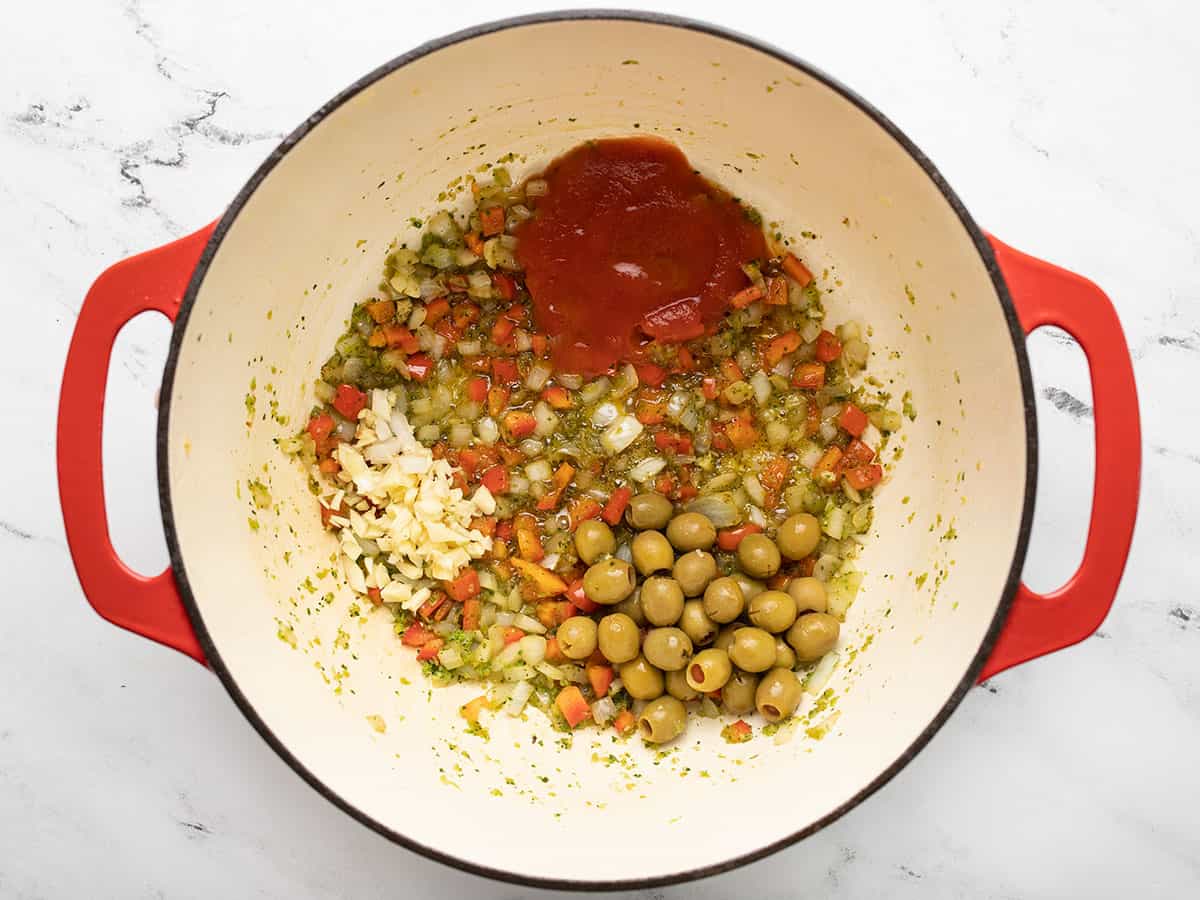
Add the garlic, tomato sauce, and olives.
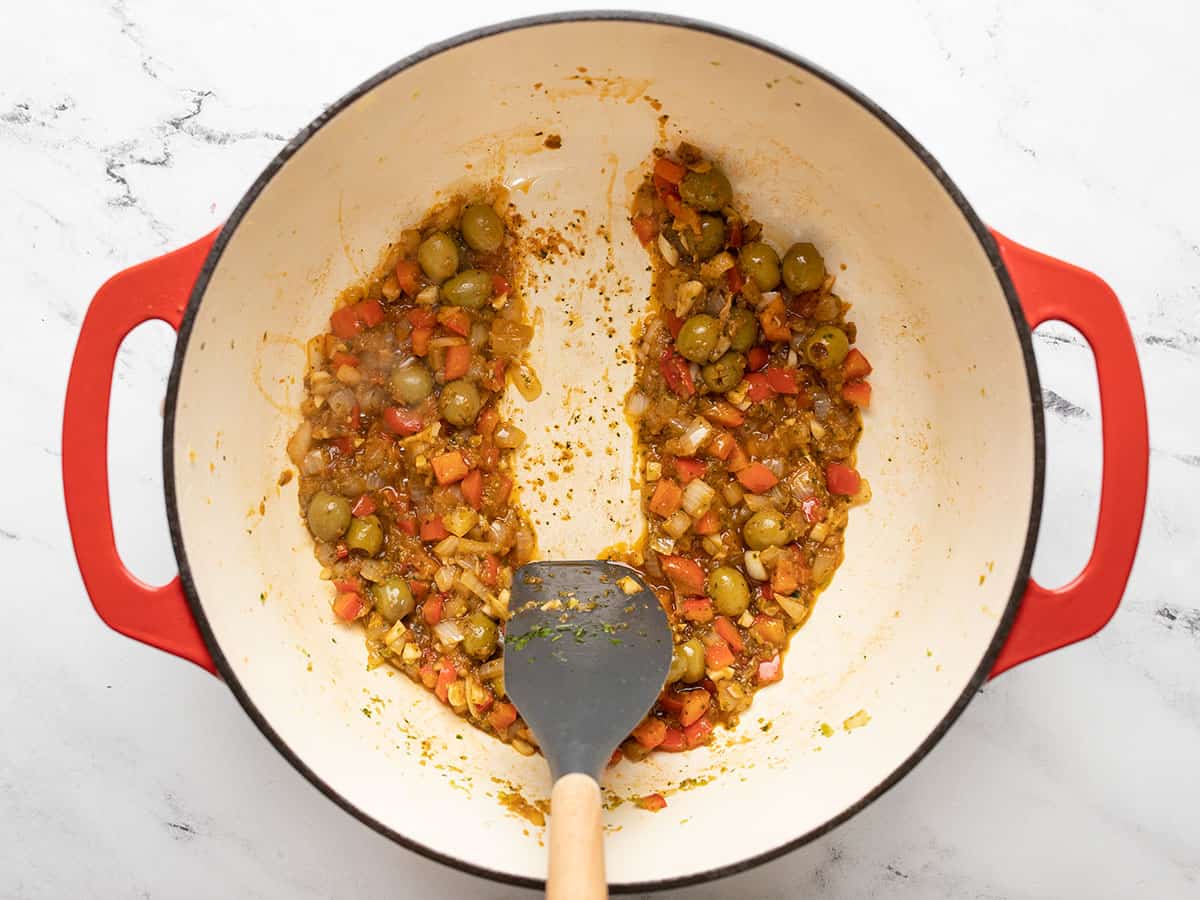
Sauté the mixture until it’s fragrant and most of the liquid has cooked out. A spoon run down the middle of the pan should leave a dry trail.
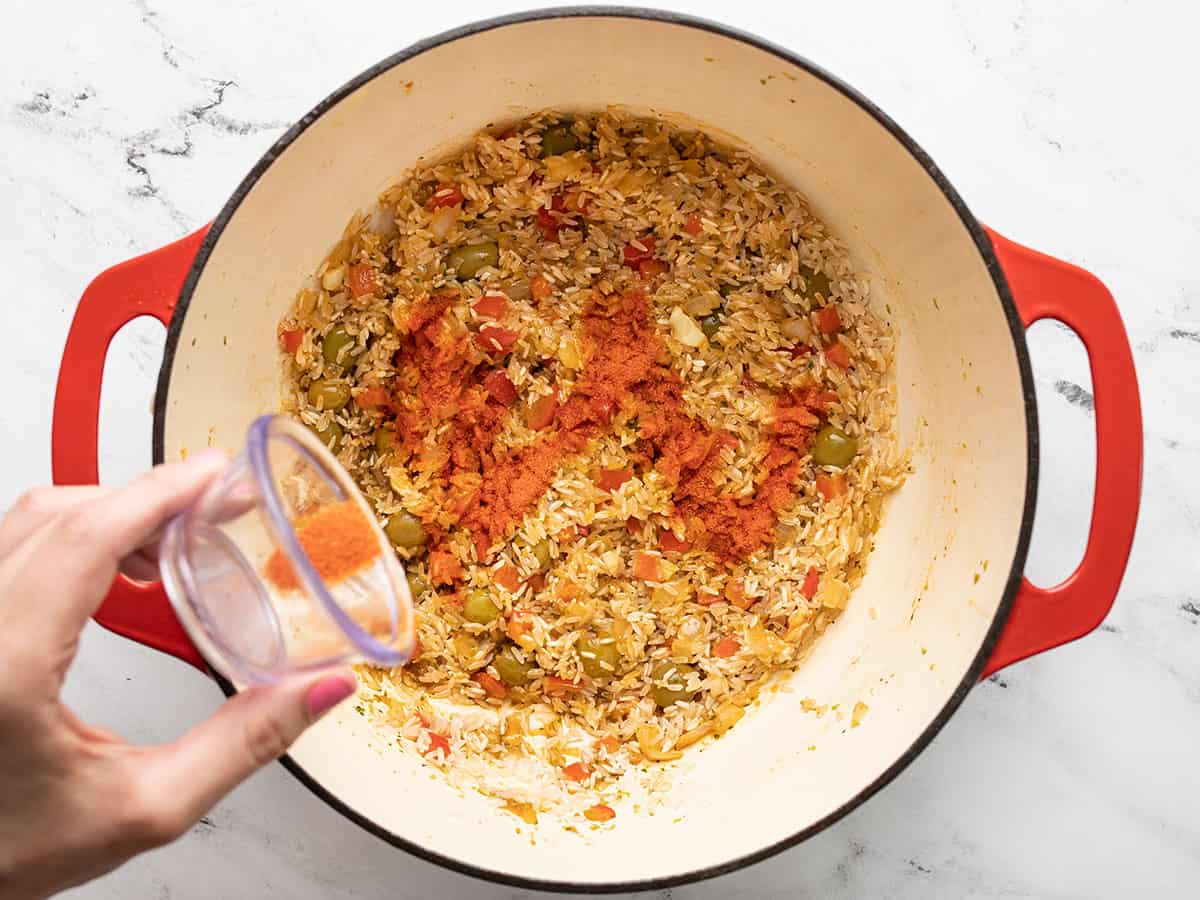
Add the rice, sazón, and salt and gently mix it into all of the ingredients so that every grain is covered in the sauce.
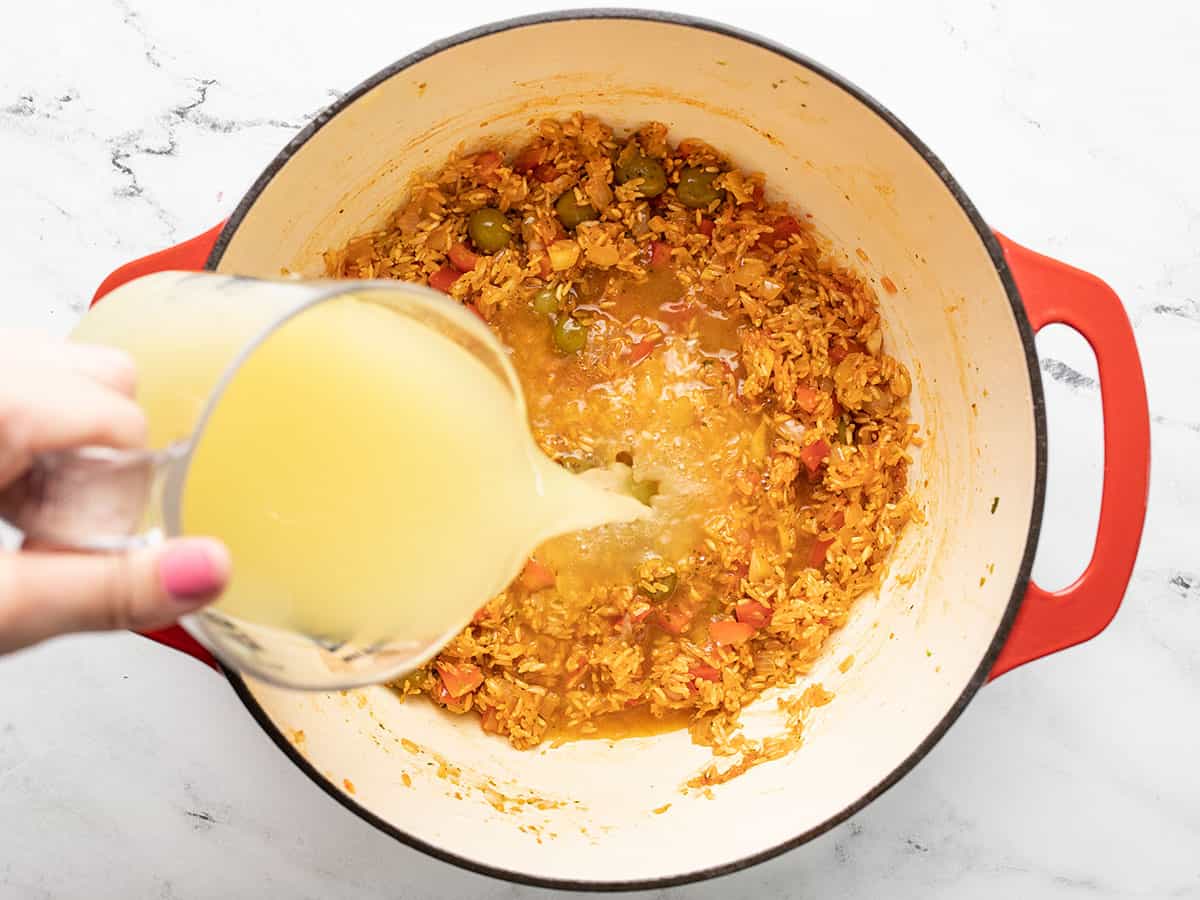
Add chicken stock and bring to a boil.
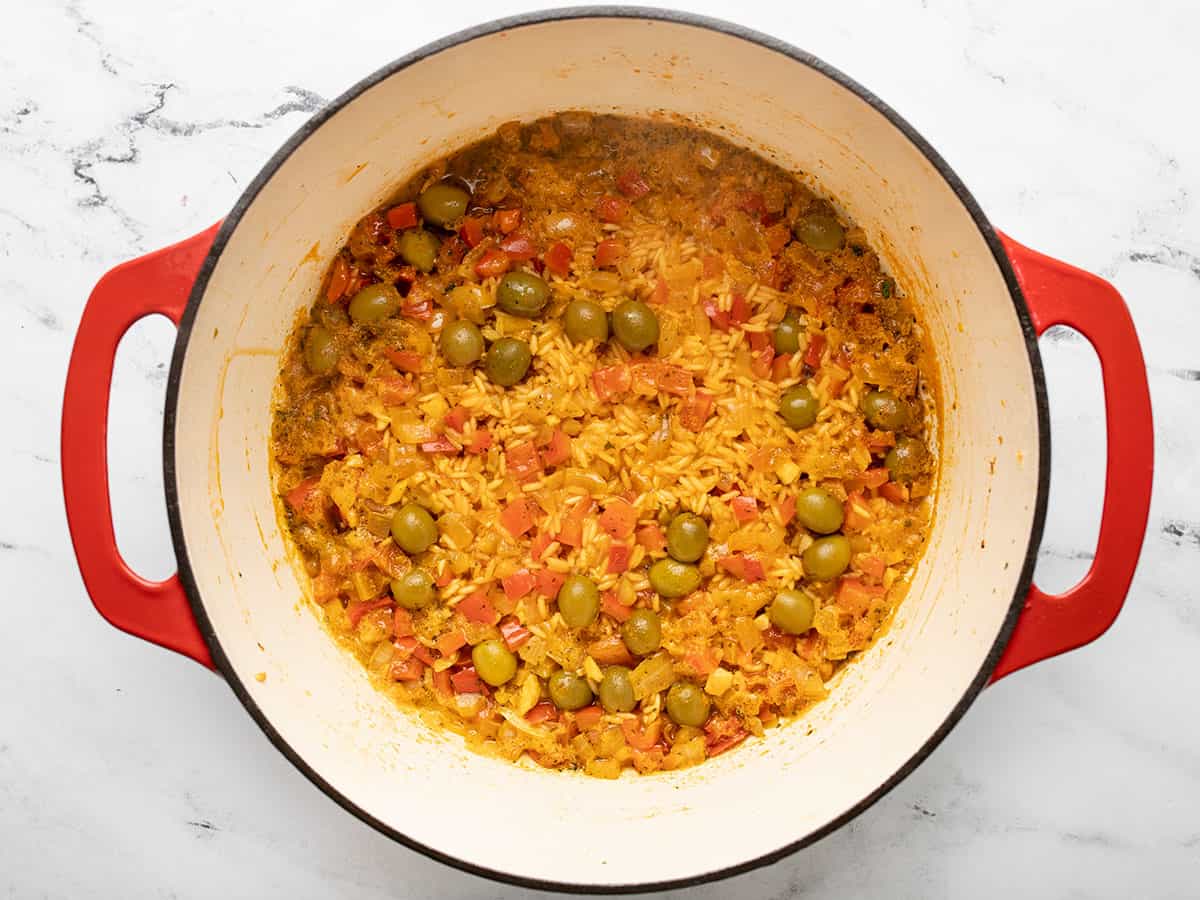
Allow mixture to boil without a lid, undisturbed, until some of the stock has evaporated and the rice is visible on the surface of the pot, about 5 to 8 minutes. There should be multiple round steam vents on the surface of the rice.
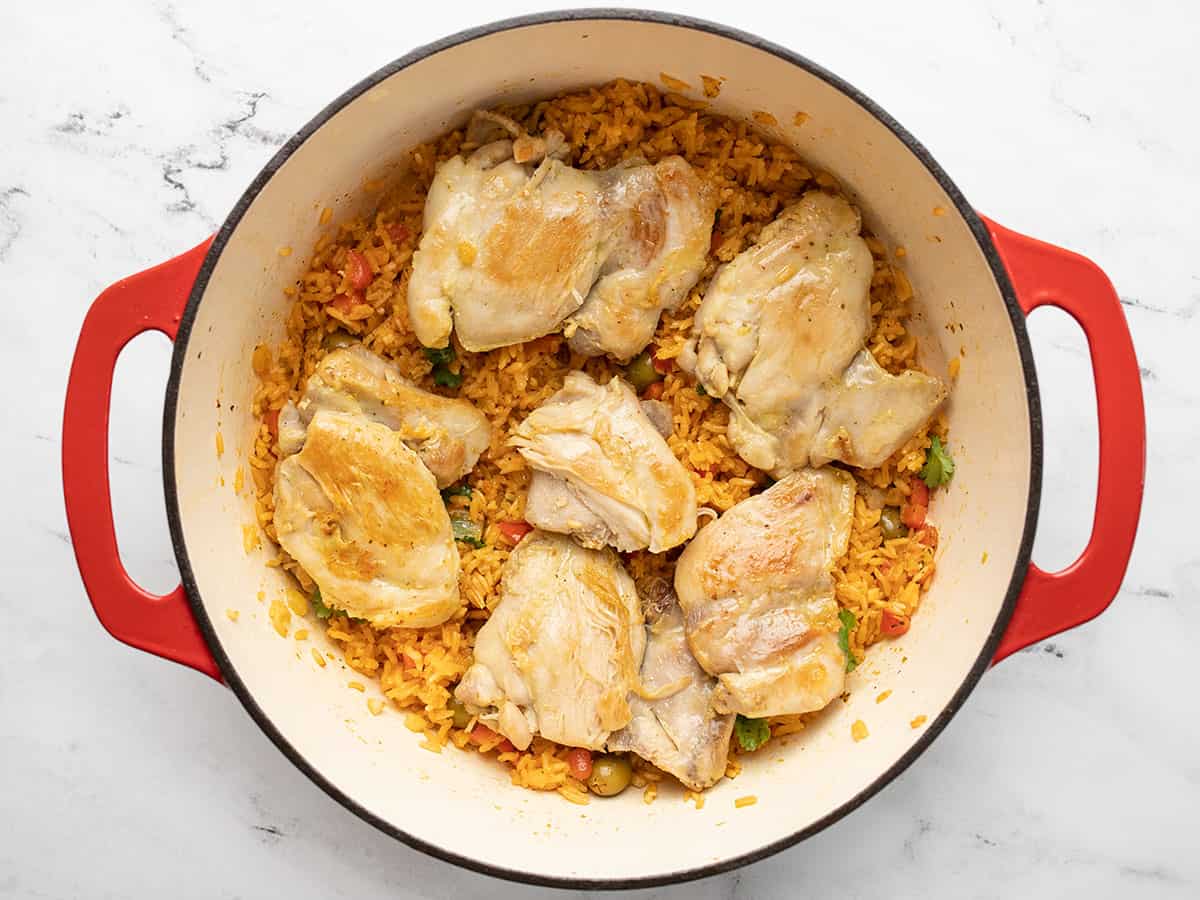
Place the reserved chicken thighs on top of the rice. Lower the heat to low and cover the pot with a tight-fitting heavy lid. Cook for about 20 minutes until all of the stock has evaporated and rice has cooked through.
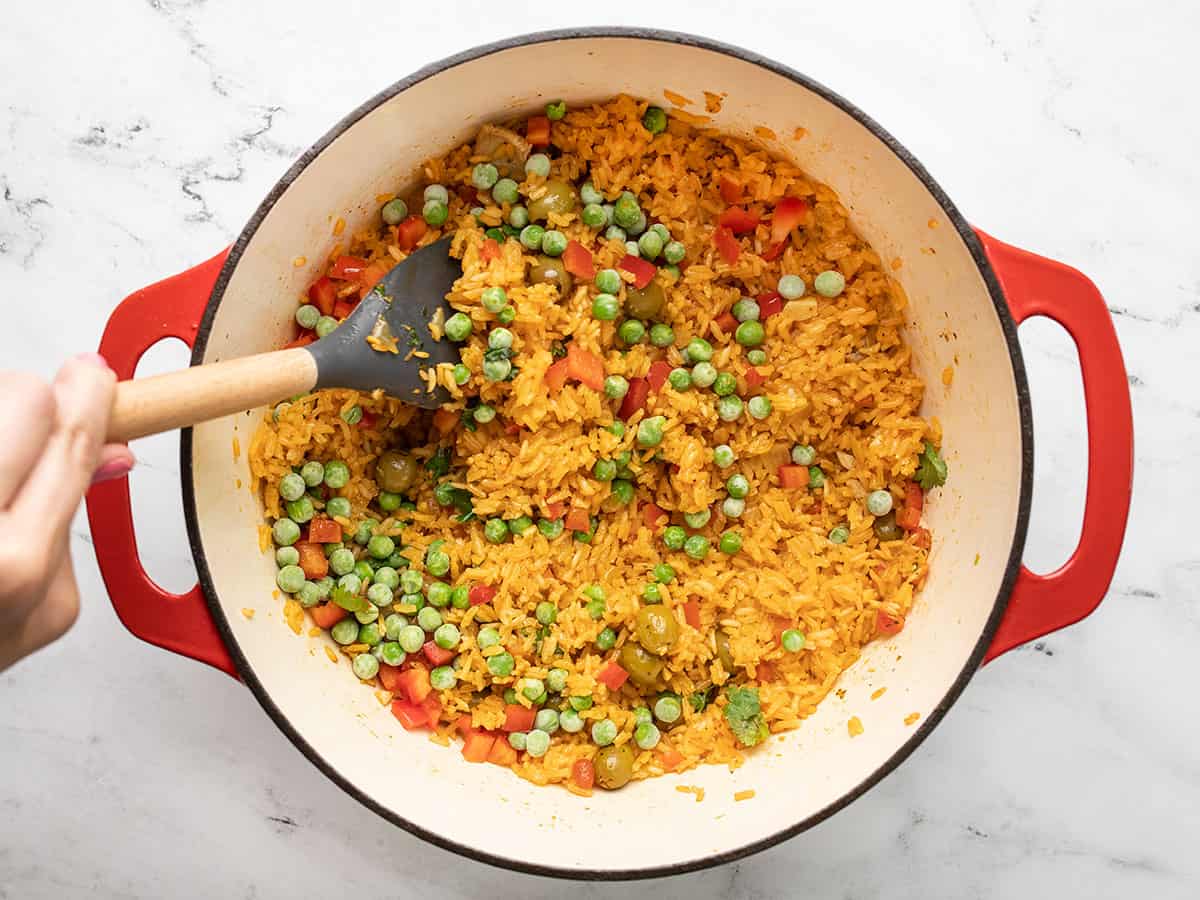
Remove the chicken from the pot and set it aside. Stir in frozen peas and fluff the rice.
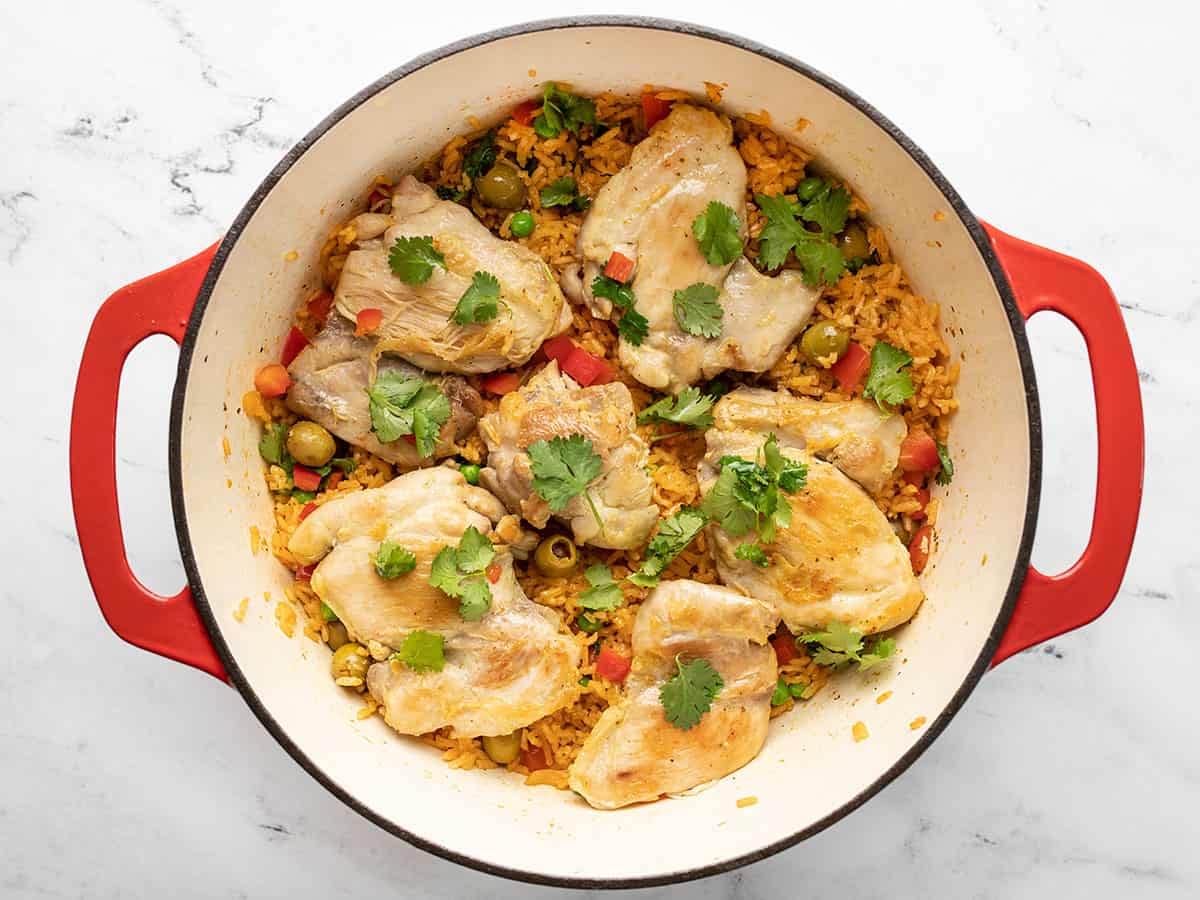
Add the chicken thighs back to the pot. Garnish with the remainder of the diced red pepper and cilantro leaves.
I’ve made this several times now and it’s fantastic! It took me a few tries to get crispy bottom rice rather than burnt black rice (I was waiting way too long). I’ve made it with brown rice a couple times, but the cook times were almost the same as I soak the rice all day. I’m actually back to get the sofrito recipe again since we used the last of it!
It turned out delicious! I’m definitely making it again. The Spanish olives added a great flavor element. I made it without any green or red peppers because I was sharing it with a friend whose stomach doesn’t digest them well. Instead, I used some large-diced carrots and I added some chopped green beans when there were 15 minutes of cooking time left. I used white Basmati rice, with excellent results. People, you have to make this!!
Hello! I made this and we loved it BUT my rice wouldn’t fully soften. I used brown rice and followed the instructions to adapt but it just would not get soft enough – it was pretty chewy even after cooking for 2 hours (late dinner that night). The only other thing I changed was unintentionally overdoing the adobo (I accidentally used too much on the chicken and also added some to the rice because I wasn’t paying attention). Wondering if the extra salt was an issue? Any ideas you have would be great because we want to make it again!
Oh and I wanted to add that I cooked it in a non-enameled cast iron pot.
Hmm… how long was the grain? The longer the grain, the more liquid you’ll need. Try 1¾ cups of water for every 1 cup of medium-grain brown rice. Bring the rice to a simmer, and as soon as it starts to simmer, lower the heat and cook, covered, until the rice is tender and the water has evaporated, 40–45 minutes. Fluff gently and let sit, covered, off heat, for 10 minutes to make it as light and fluffy as possible. And don’t forget- brown rice is supposed to have a chewy texture. Almost like a bounce to it. XOXO -Monti
Thanks! I’m familiar with the texture of brown rice, it’s all I cook. So I should just follow normal cooking instructions instead of leaving it uncovered like in the recipe?
Hi! I’m unsure what you’re saying here. The recipe says to bring white rice to a simmer uncovered, and then when the steam vents form, cover the rice. You can’t leave it uncovered, the rice won’t soften. It needs the steam to cook through.
Then in the recipe post I add: “If you want to substitute the white rice for brown, you’ll need to add more chicken stock. For 2 cups of brown rice, use 4 cups of chicken stock. You will also need to increase the cooking time by ten to fifteen minutes.” Again, it’s best to follow the ratios on the bag of rice you purchased, as not all brown rice is created equal. It might take longer to cook.
Did I answer your question?
Sorry I wasn’t clear, I was referencing the part about leaving it uncovered until the steam vents appear. Making it again tonight and skipped that part to ensure I didn’t lose too much liquid. After the full brown rice cooking time (per the package) the rice is still too chewy (not as bad as last time but not normal texture) and swimming in liquid. Very disappointing. I’m guessing the salt is interfering with the cooking. Seems like this recipe doesn’t work with brown rice. Thanks for trying to help.
We have a new person starting in the next week or two. Hopefully, the added hands mean we will be able to test rice recipes with brown and white rice. Goals.
Same problem :( the recipe does not say to only use white rice, just says “rice.” I assumed brown would be fine, but it’s very hard after over an hour of cooking. Bummer.
Ordered the Goya tomato sofrito but it was out of stock. Out of peas too, boo. At some point I realized the Puerto Rican sofrito was the actually the green sauce anyway so I just winged it by putting green pepper, onion, garlic, cilantro and parsley in my mini chopper. My teen is now shoving serving 3 in his face so I’d say it was a dashing success. I’ve made arroz con pollo many times but this was the first time Puerto Rican style. Muchas gracias !
Thanks so much for trying it out! We also have a sofrito recipe linked in the post, though it sounds like you winged it pretty well. XOXO -Monti
Gahh, I totally missed that and didn’t realize the orange highlighted words were clickable links. I’m definitely going to make and freeze the recaito. That’s genius.
DUDE! I do the same thing. I have ADD, though. I can’t tell you how many times I’ve been like, WHERE IS THIS THING!!, when I’m staring at a page, and Beth is like -RIGHT IN FRONT OF YOU. Anyhoo- have fun making the sofrito, and don’t forget you can use it as a base for sauces, rice dishes, and soups. XOXO -Monti
Hi, what kind of Goya sazon flavor do you use in this recipe?
Culantro and Annatto! XOXO -Monti
This recipe is fantastic. I didn’t believe the chicken would get cooked through in the time allowed but it literally was perfectly done when the timer went off. I will make this over and over. Thank you so much for a delicious and cost conscious recipe.
Abby!! You made my day. Thank you for your lovely comment and, more importantly, for making a Puerto Rican dish!! XOXO -Monti
Hi friends! For those of you concerned that the rice is burning at the bottom of the pot, that is what you want to happen. Not charred, but golden brown. The crispy rice produced is called “pegao” and is considered the highlight of the dish. XOXO -Monit
This recipe came out really well for me, but I also ran into issues with the rice burning at the bottom of the pot so next time I make this, I’ll do lower heat 😁 thank you so much for this recipe!
Hi Nat! The golden brown crispy rice that develops at the bottom of the pot is not a mistake. It is known as “pegao” and it is what you want to happen. Pegao is considered the best part of the rice dish and is often fought over. XOXO -Monti
I live practically next door to Puerto Rico, so I was thrilled for a chance to use my sazón, some pigeon peas (in place of frozen green) and recao (in place of cilantro). However, I have to agree with those who commented on the process difficulties of this recipe. Even in a heavy-bottomed pot and with a stove burner proportional to my pot size and set on low, my rice scorched and stuck to the bottom of the pot. Also – someone has already pointed out that the 1/4 tsp of salt is in the ingredient list but not in the recipe instructions. It might seem like a small matter, but this is the kind of omission that reduces the blog’s credibility for the user.
Hi Talia, I assume you live in Florida, and hope you and your loved ones are safe after the hurricane. I am Puerto Rican, and my family is still dealing with the after-effects of Fiona. I’m sorry you burned your rice. It sounds like you let too much of the stock evaporate before covering it. You don’t have to cook out all of the stock with the lid off. It is just for a few minutes until the stock has evaporated enough for you to see the surface of the rice. I have added time cues for those that have difficulty working with visual cues. Please understand that time cues are not as accurate as visual cues, as the heat level, humidity, and type of pot are all variables that change the amount of time it takes for the stock to evaporate. Learning how to use your senses while you cook, instead of sticking blindly to a time cue, will up your cooking game 100 notches. As soon as you see the surface of the rice and it has round steam vents, lower the heat and cover the pot. XOXO -Monti
Similar to another commenter, just leaving the rice and stock boiling resulted in the rice burning at the bottom before the stock boiled off at the top. Maybe my burner was too strong but it may help to change the instructions to have things at a lower boil or some other guidance. Haven’t completed recipe yet, but wanted to chime in because it’s obviously already become a different experience for me than intended.
Hi Nick, I have made this recipe literally hundreds of times with great results. There could be a number of things going wrong. Are you using a heavy-bottomed pot? This conducts and controls heat, unlike lightweight pots, which lead to scorching. Is the flame on medium-high? If it is on high, you will burn your rice. Is the broth boiling, or is it at a raging boil? If it is at a raging boil, lower the heat, as it will evaporate before the rice has a chance to cook, and your rice will burn. More than anything, it sounds like a lack of control when it comes to heat. You also don’t need to cook all of the broth out before lowering the heat. Just until the surface of the rice appears. I hope this helps. XOXO -Monti
Made this for dinner last night and it was delicious! Light and fluffy rice seasoned to perfection! Thank you for this amazing recipe!
Thank you, Susan!! XOXO _Monti
The flavors of this dish were on point! So delicious and I’m glad I discovered sazon through this recipe. I was super confused about boiling without a lid to cook the rice though. I wasn’t sure if I was supposed to go until all the liquid was gone or not but the recipe seemed to me like I was supposed to. I checked the bottom before I put the chicken back in to steam with the lid on and it was fine but the entire bottom of my rice was burned by the end. Super disappointing and I wish I would’ve left some liquid in the pot before putting the lid back on. I also missed where the salt was added so I just added some at the end. I’m definitely trying again with those tweaks and I look forward to mastering this dish!!